
This tutorial shows a step-by-step guide on how to launch an Amazon EC2 instance. We will launch a t2.micro instance using the Amazon provided AMI of Ubuntu 18.04. Let’s get started.
1. Login to AWS Management Console https://aws.amazon.com/console .
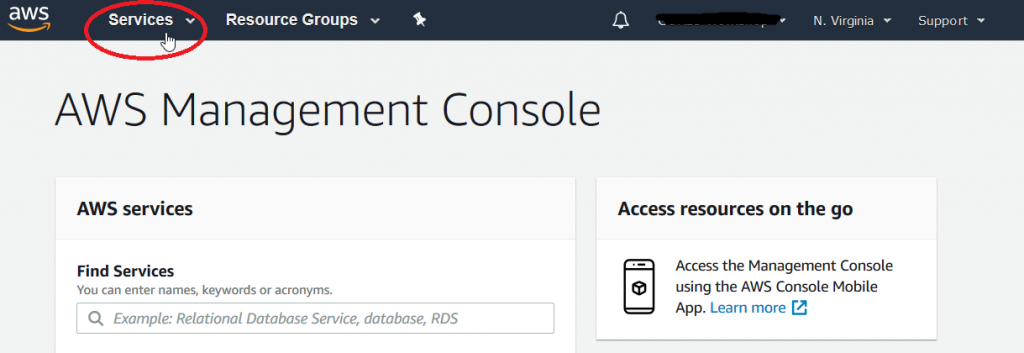
2. Once logged-in, click the Services button on the top left corner.
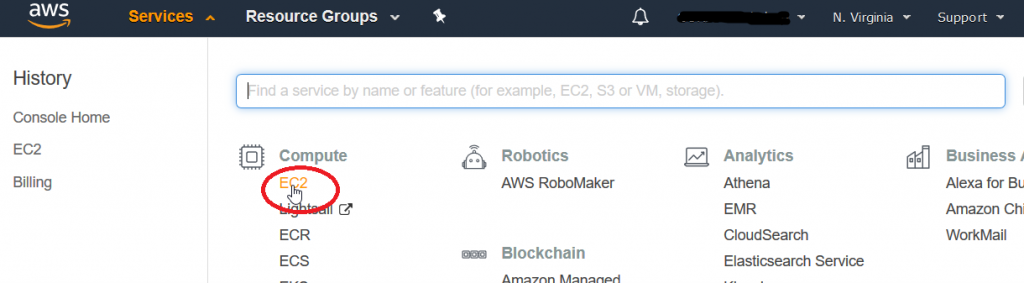
3. On the list of Services, click EC2.
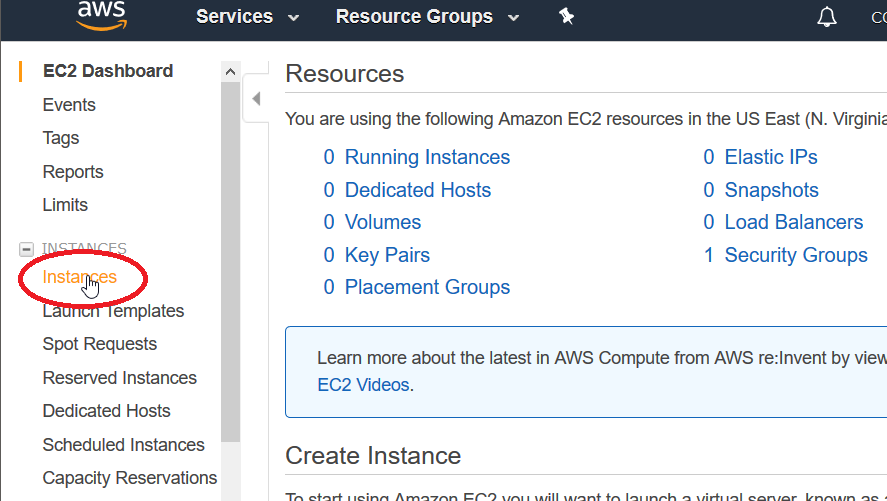
4. Click Instances the left side to view your current instances.
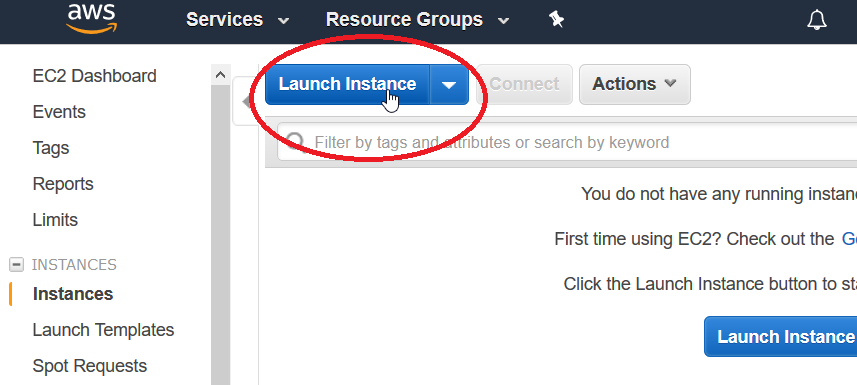
5. Click the Launch Instance Button to launch the EC2 creation wizard.
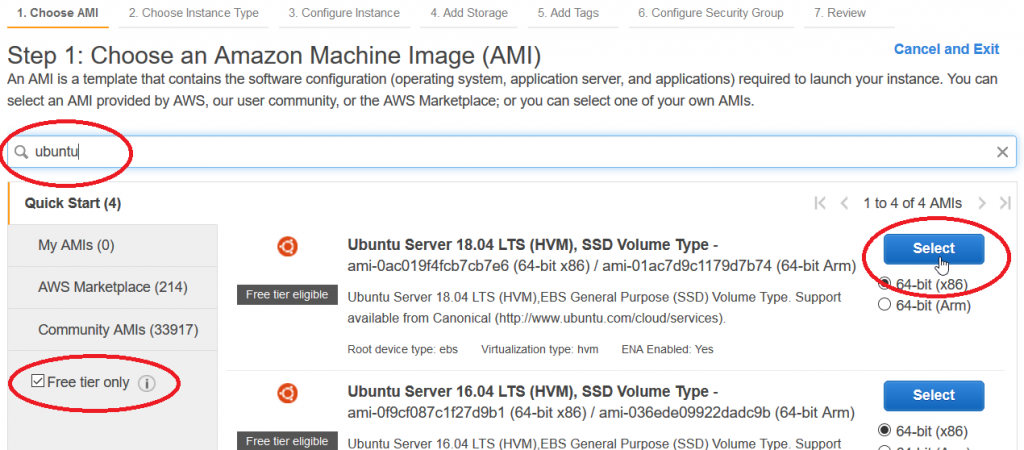
6. The wizard will have 7 steps for launching an instance. On Step 1, Type ubuntu on the search box and check the “Free tier only”. Click Select to choose this AMI. Click Next to proceed to next step
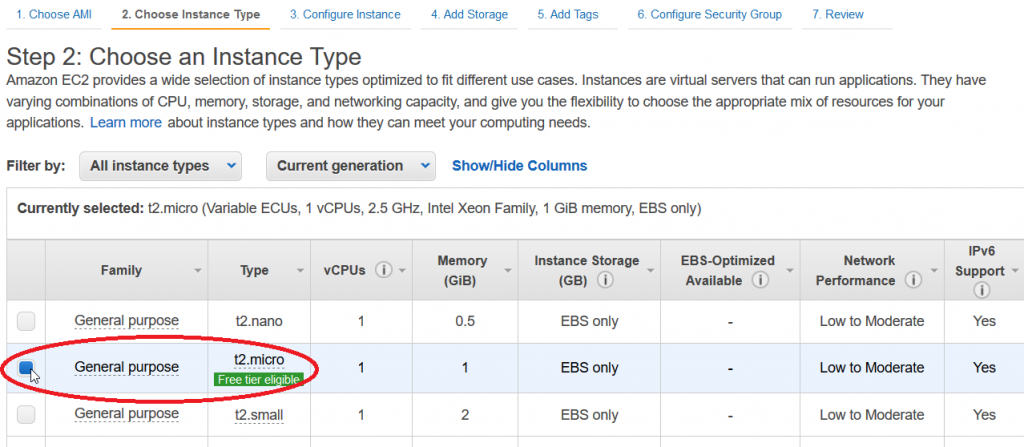
7. On this step, we’ll choose the Instance Type. Since this is a test instance only, we’ll choose t2.micro. Click Next to proceed to next step.
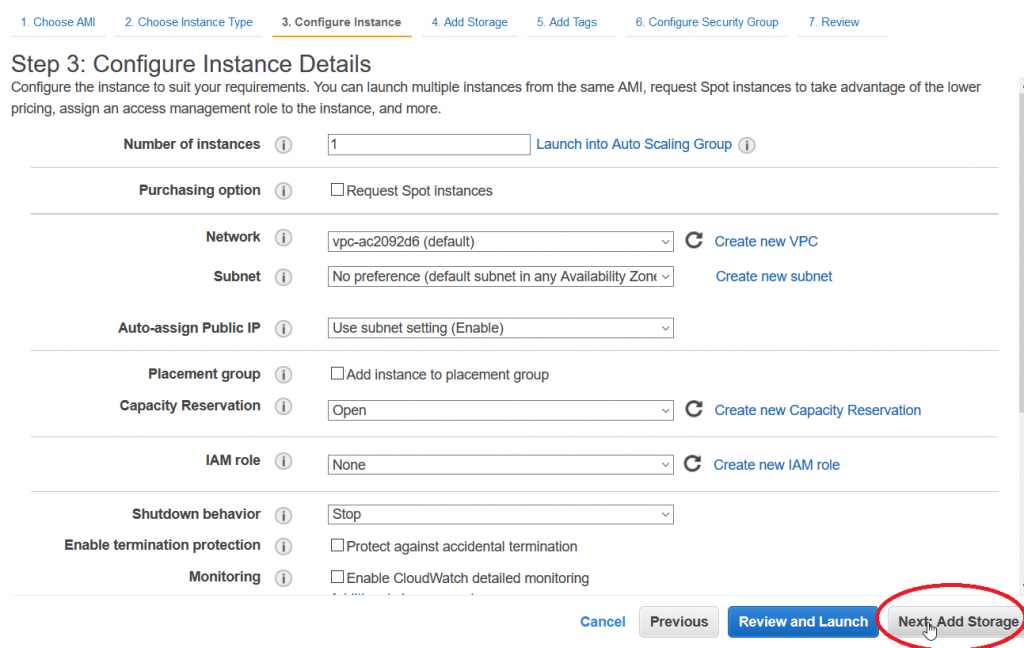
8. On this Step, we’ll provide the Instance Details such as VPC, Subnet, IP address, IAM role, Termination protection, CloudWatch monitoring etc. We’ll leave the defaults for now. Click Next to proceed.
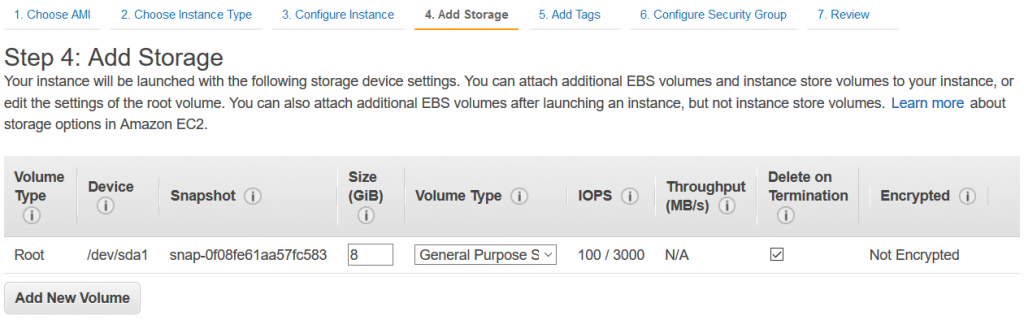
9. On this step, we’ll specify the storage we want for the instance. The default 8GB is fine for our testing. But you can add more if you need it. and even add a separate virtual disk. Click Next to proceed.
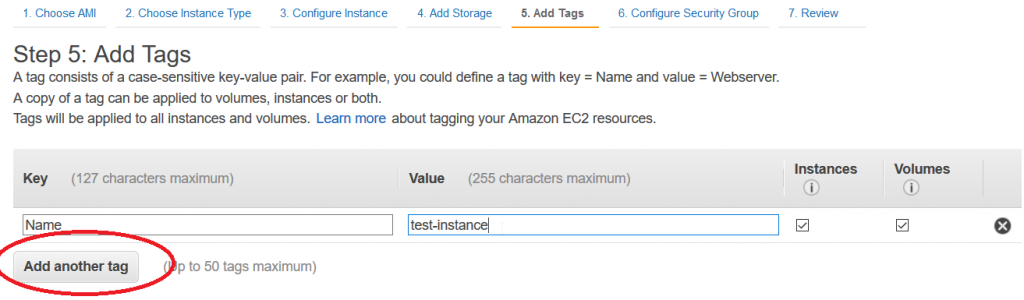
10. This step is important for identifying your instance. Be sure to give it at least one tag – Name: test-instance. Click next to proceed.
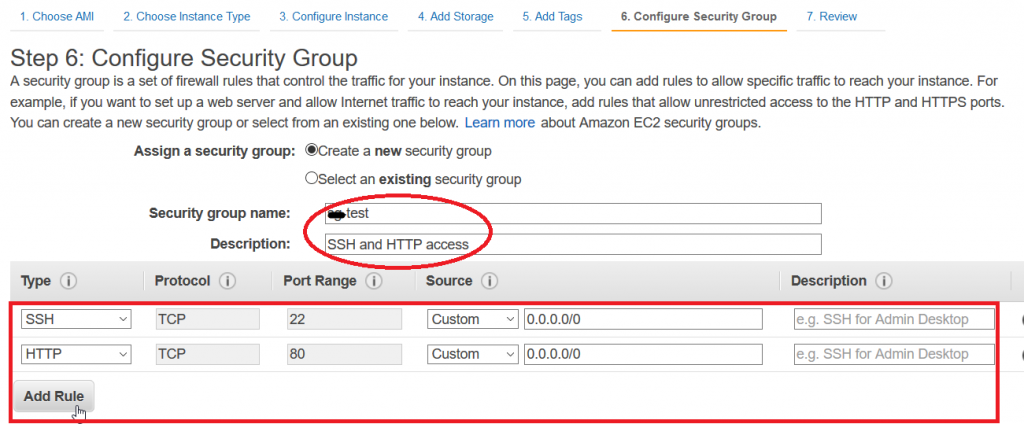
11. This steps will setup the firewall for your instance. Create a new security group named “test-sg” and add a description. The SSH default port allowed will be port 22. Click Add Rule and add HTTP port 80 to allow source 0.0.0.0/0. Click Next to proceed.
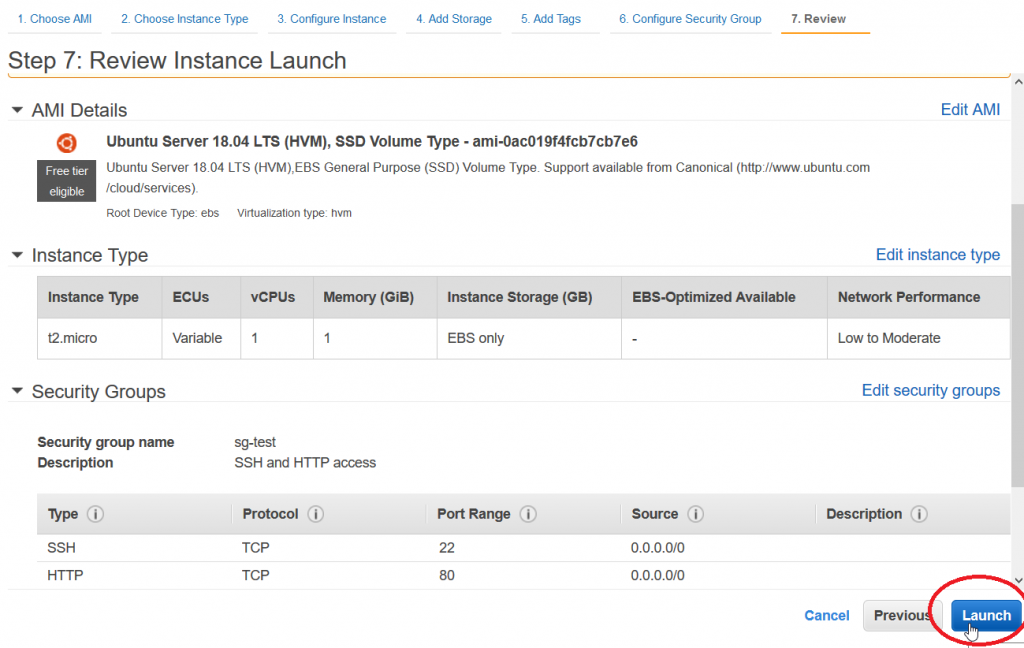
12. On the last step, you can review your settings for your instance. If you are satisfied with the settings, click Launch to create your instance.
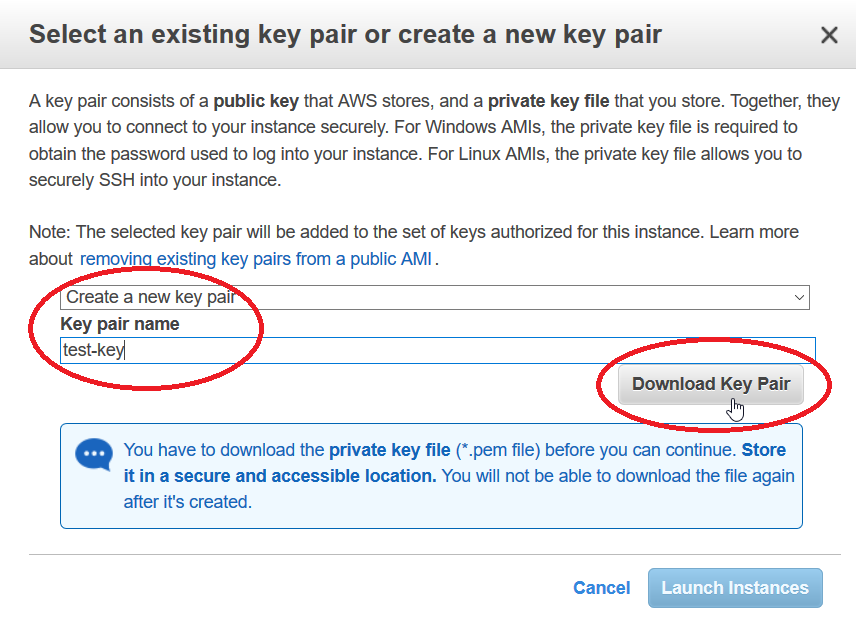
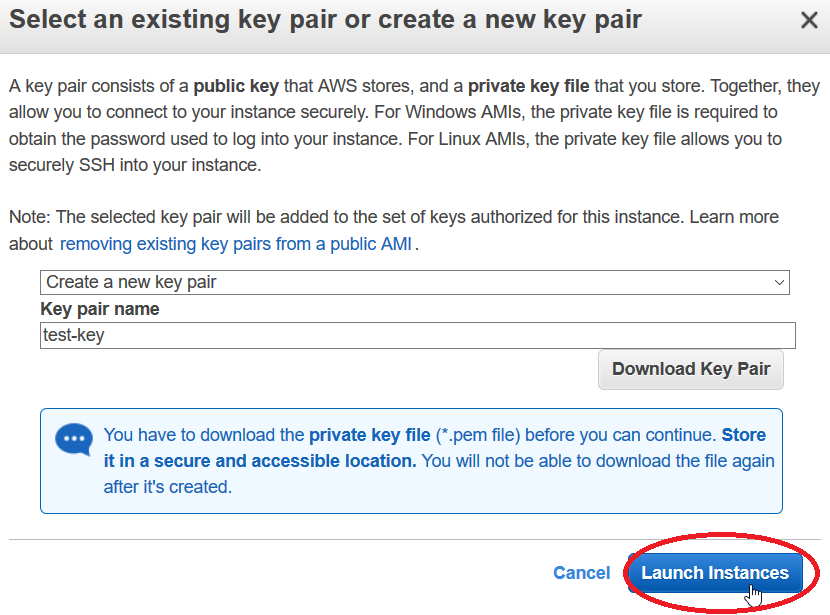
13. We need to choose a key pair for your instance. We will generate a new one so choose “Create a new key pair” and give your key pair a name. Click “Download Key Pair” to download your new key pair. Be sure that you successfully downloaded it since you won’t be able to download it again.
14. After downloading the key pair, you can now click the “Launch Instances” button to start the creation of your instance.
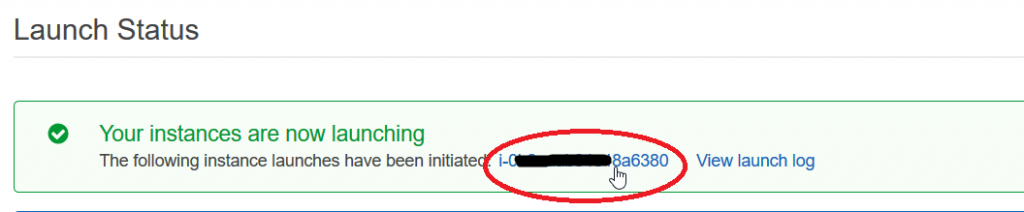
15. You should see a Launch status message that your instance is launching. Click on the instance-ID to go to your EC2 instances list.
16. Your instance should be running now and Status Checks shows Initializing.
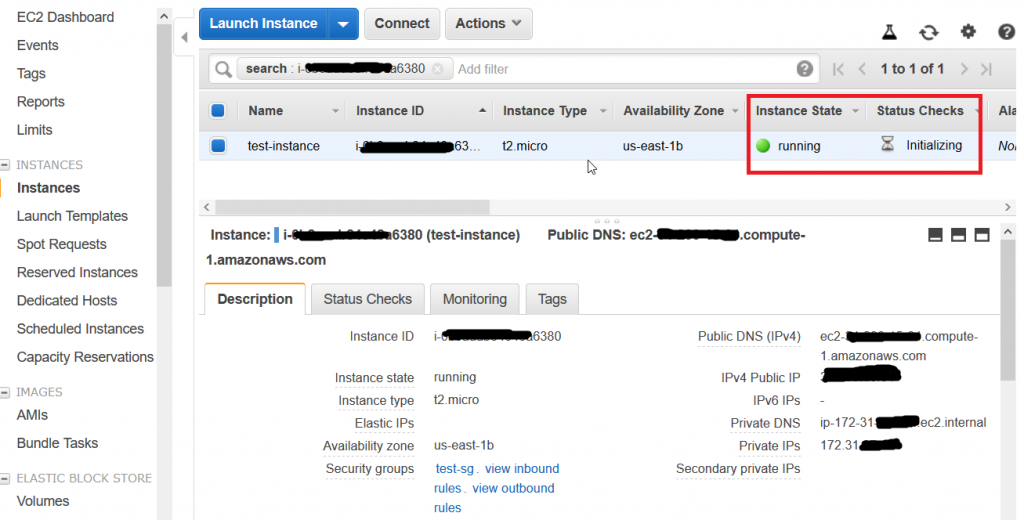
Wait for a few minutes until the status checks are passed and your instance is now ready. You next step should now be to connect to your instance using SSH.
———————— ————————
– masterkenneth